An Incident Report is a form that is filled out in order to record details of an unusual event that occurs at a facility or school, such as an injury to an individual. The purpose of the incident report is to document the exact details of the occurrence while they are fresh in the minds of those who witnessed the event. This information may be useful in the future when dealing with liability issues stemming from the incident.
Generally, according to health care guidelines, the report must be filled out as soon as possible following the incident (but after the situation has been stabilized). This way, the details written in the report are as accurate as possible.
Most incident reports that are written involve accidents with individuals, but most facilities will also document an incident in which a staff member or visitor is injured.
Incident Report Walkthrough: #
Who can access an Incident Report #
If you are currently subscribed to a Residential, Therapeutic, or School plan, you will see an “Incident Reports” link in the main navigation of the app.
How to customize Incident Reporting for an individual #
- Open the Profile for a particular individual
- Select the Incident Report Customization option
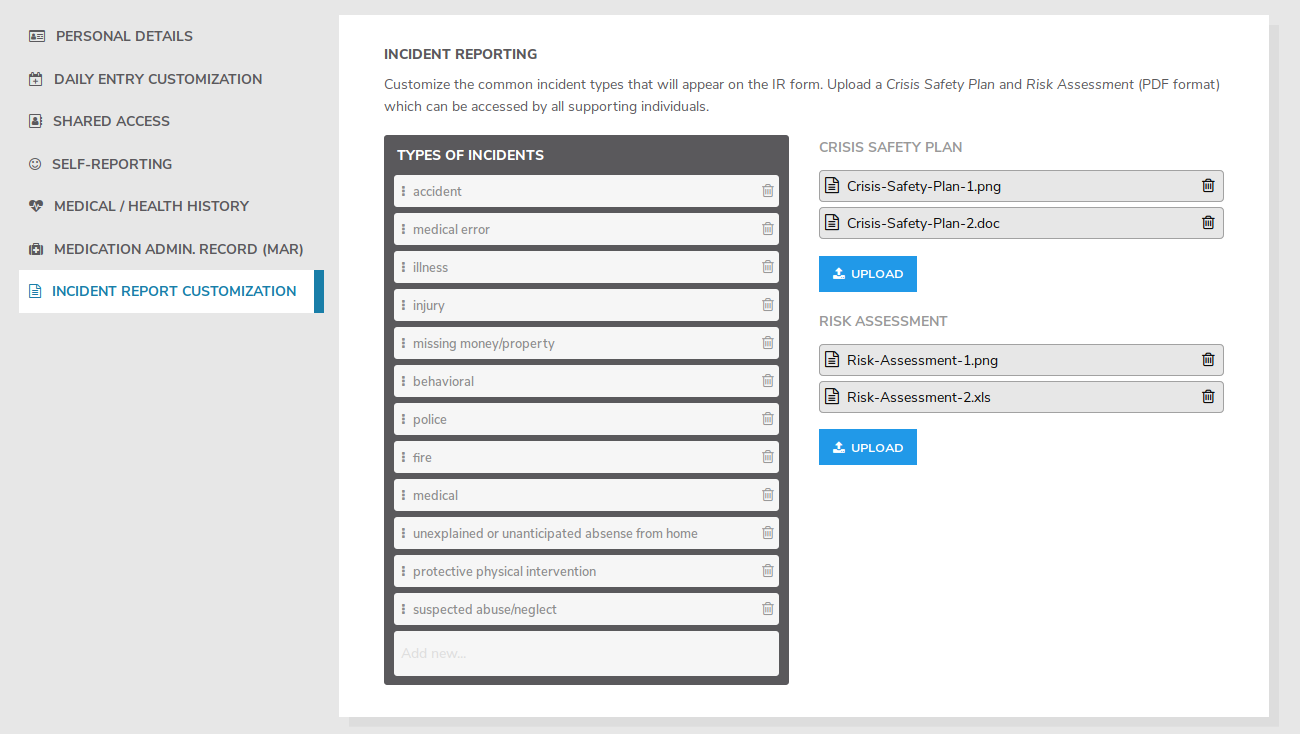
- Here you will find a pre-populated list of the most common types of incidents. You can add additional types or remove irrelevant items specific to this individual.
- Upload a Crisis Safety Plan and Risk Assessment for your organization or school which can be reviewed by other staff members.
Creating a new Incident Report #
- Click on “Incident Reports” in the main navigation and click the “+ Create” button in the blue header.
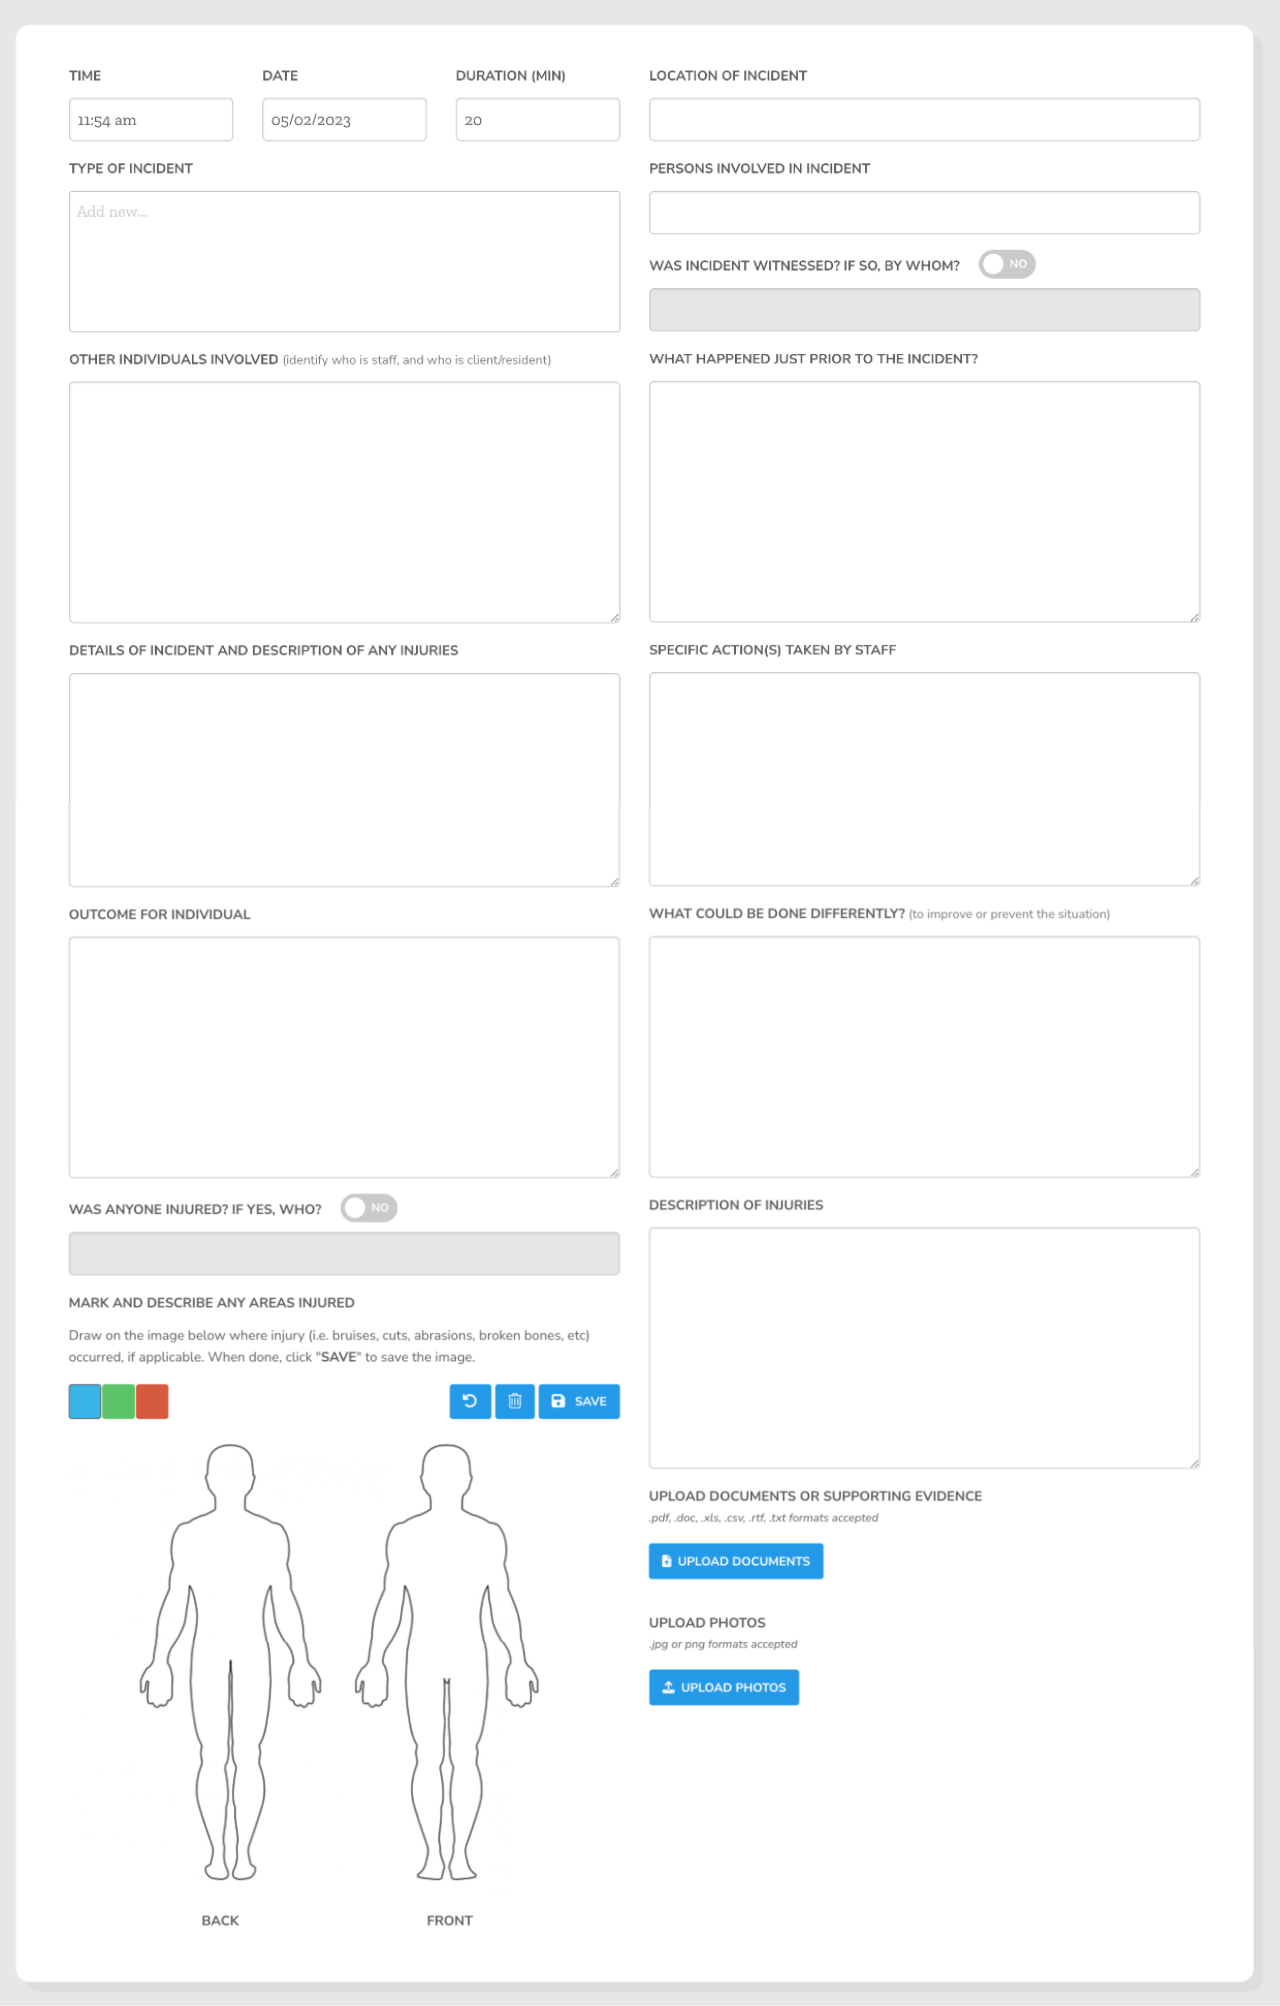
- This will open a new Incident Report form where you can fill in all fields with as much detail as possible.
- Time, Date, and Duration of the incident.
- Location of the incident, like the classroom or facility where it occurred.
- Select the Type of incident that occurred. By tapping or clicking on “Add new…” a drop-down menu will appear which will display all options you configured on the customize steps above.
- Persons involved in the incident: List other staff members or individuals.
- Was the incident witnessed? By toggling the selector to Yes, you can fill in the name(s) of the witness(es).
- Other individuals involved: identify who is staff and who is a client, resident or student.
- What happened just prior to the incident? Take a moment to reflect on what happened just before the incident occurred which may have triggered the event.
- Details of the incident and description of any injuries
- Specific action(s) taken by staff
- Outcome for the individual: what was the outcome of the incident, specific to the individual being reported on.
- What could be done differently to improve or prevent the situation in the future? Reflect on what could have prevented the incident from ever occurring.
- Was anyone injured? By toggling the selector to Yes, you can fill in the name(s) of the individuals who were injured.
- Mark and describe any areas injured. On the image, draw with your mouse or finger on the areas where the injury occurred. The image editor provides different colors that can be used to help refer to descriptions in the accompanying Description of injuries field, as well as undo and reset functions. Do not forget to tap or click the SAVE button once you are done as this field cannot be auto-saved like the rest of the form.
- Upload photos or supporting evidence if any are available to help describe the incident in better detail.
- The Incident Report will be in a Draft status so you can leave and return to the form later if you need to. It will not appear on the Incident Reporting page until you submit it for review.
If this IR has restricted information about abuse, exploitation, or other sensitive personal information, turn on Restrict Access. When enabled, this IR will only be viewable by the Account Owner, Managers, and Supervisors.
When authoring the IR the appropriate supervisor/reviewers should be tagged on the ‘Responsible Parties’ list. Managers or collaborators given the ‘IR Supervisor’ role can further assign ‘Responsible Parties’ that are required to review and approve the IR after the initial submission by the author.
Once you have completed the form and it is ready to be reviewed, toggle the Signature confirmation switch and type your full name as your signature. After you submit the incident report, an email will be triggered to all Managers as well as those individuals selected under the ‘Responsible Parties’ list, alerting them that it now is ready for review and approval. 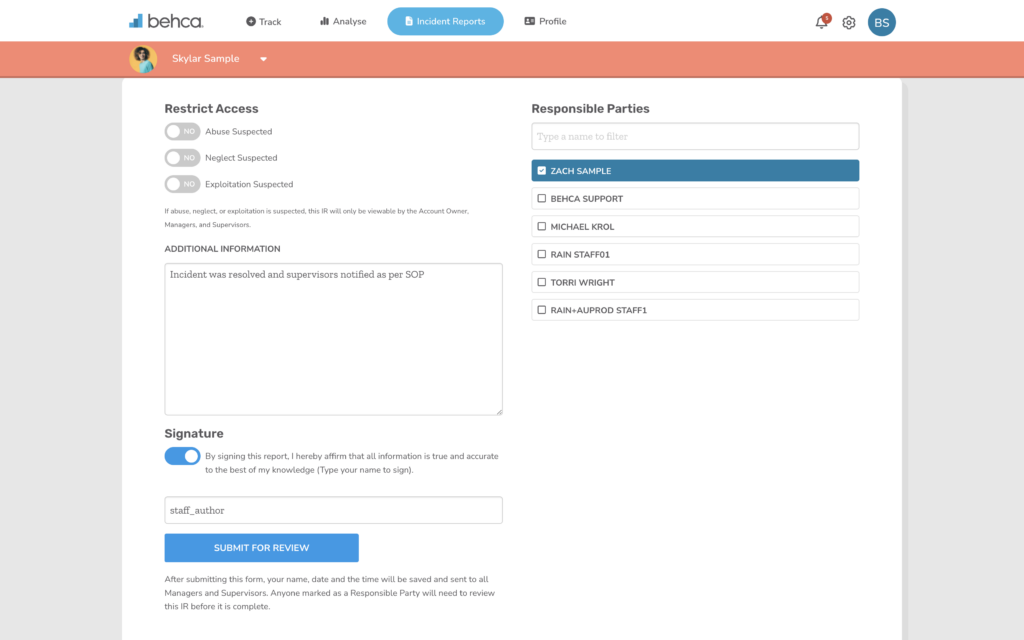
NOTE: Once an Incident Report is marked as Ready for Review, only a Manager, Supervisor, or the original author can edit it.
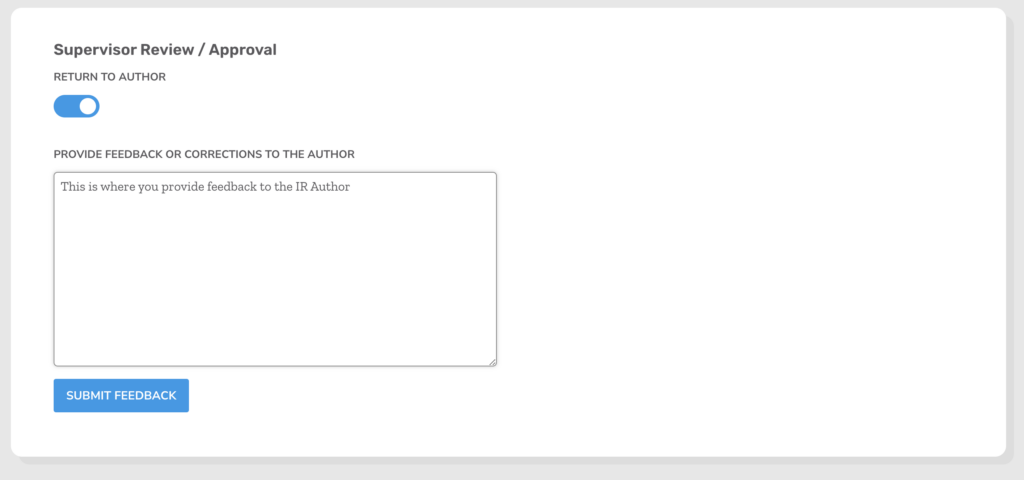
Supervisors and ‘Responsible Party’ collaborators will see additional fields where they can add their own remarks around corrective actions, as well as the option to ‘Return to Author’ which is intended to communicate instructions back to the original IR author. Once the review is complete, toggle the “Sign Report” switch and type your name to sign the report.
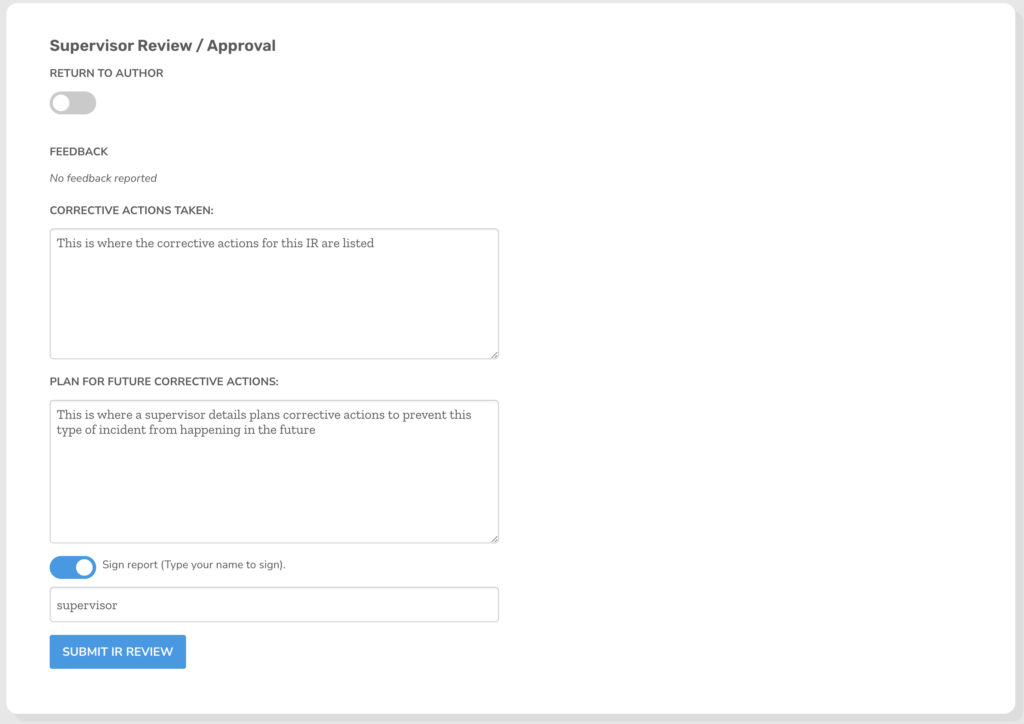
Once a report is reviewed by a approved by all ‘Responsible Parties’ it can be downloaded as a PDF file from the Incident Report page.